Solving a Code Challenge
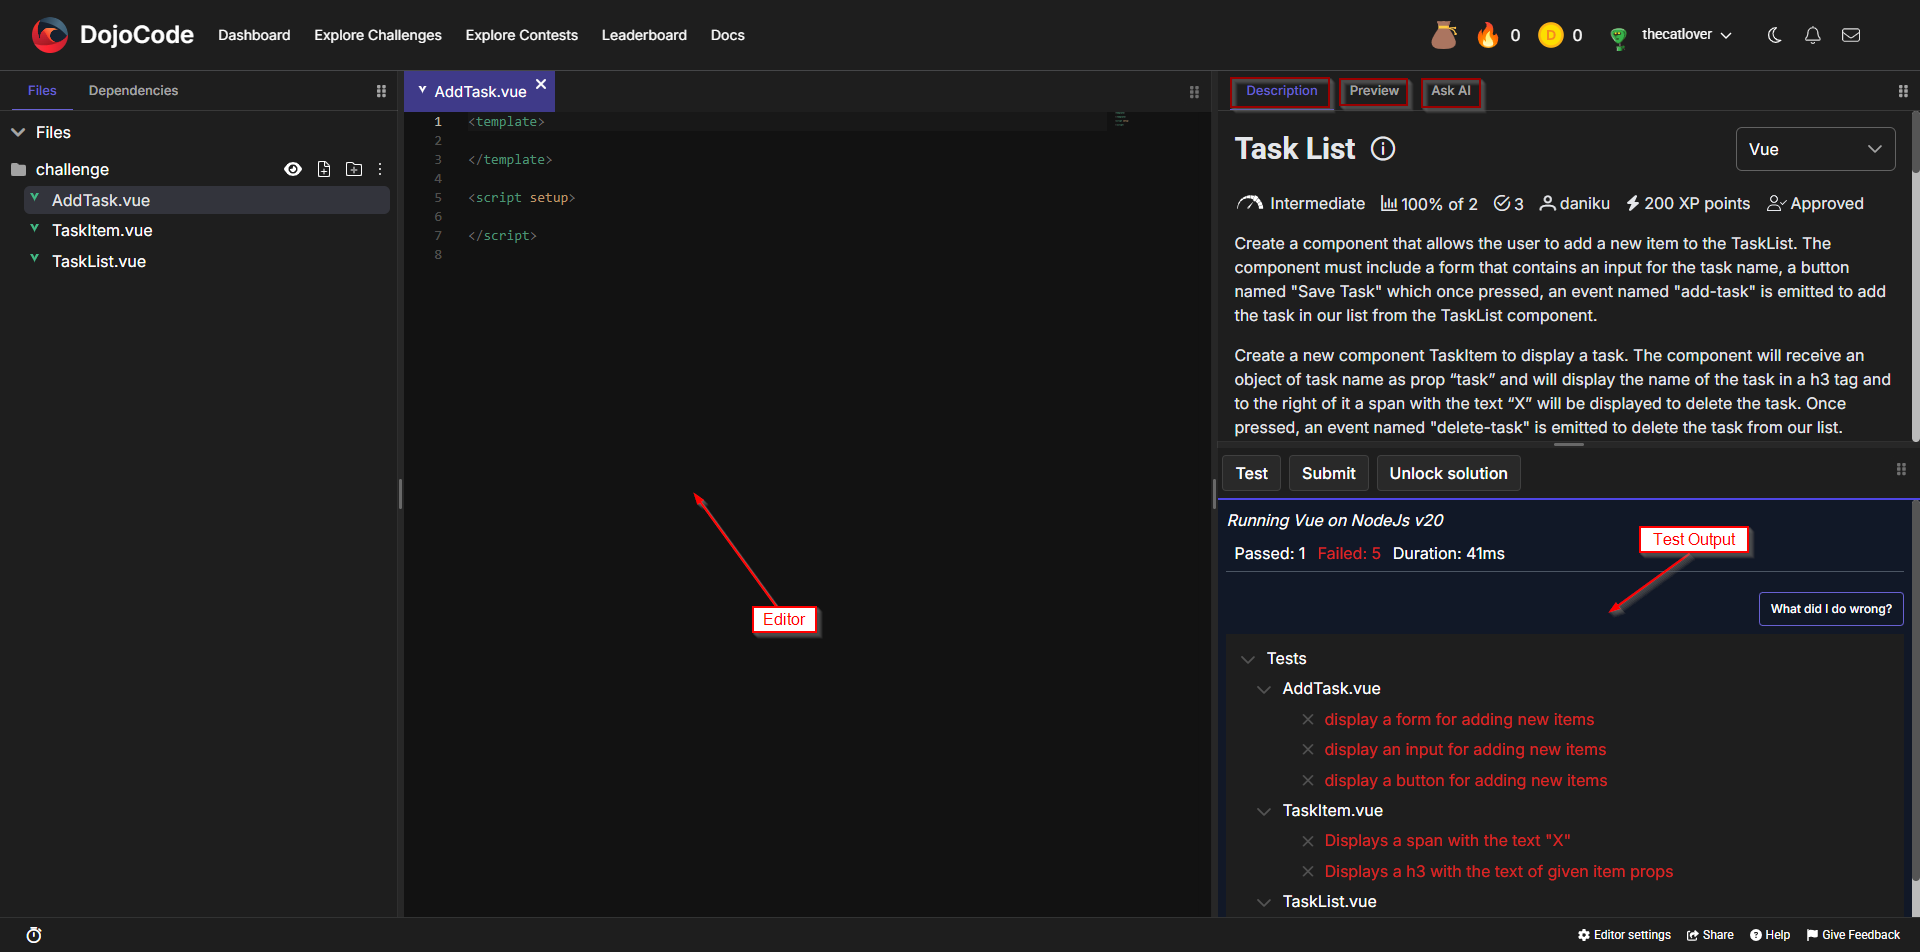
Fig. 1
Let’s solve a DojoCode Challenge! In a challenge, you will be able to run your code and submit it.
When you open a challenge you will find the Challenge Info (Fig. 1) that includes the title and description. Right below the title, you can find the Challenge info bar that includes a satisfaction rating, the name of the author and the XP points you receive for completing the challenge. The description itself provides comprehensive details, including practical examples, input/output specifications, code snippets, and, for frontend components, HTML snapshots to help you visualize the expected outcome. (Fig. 3)
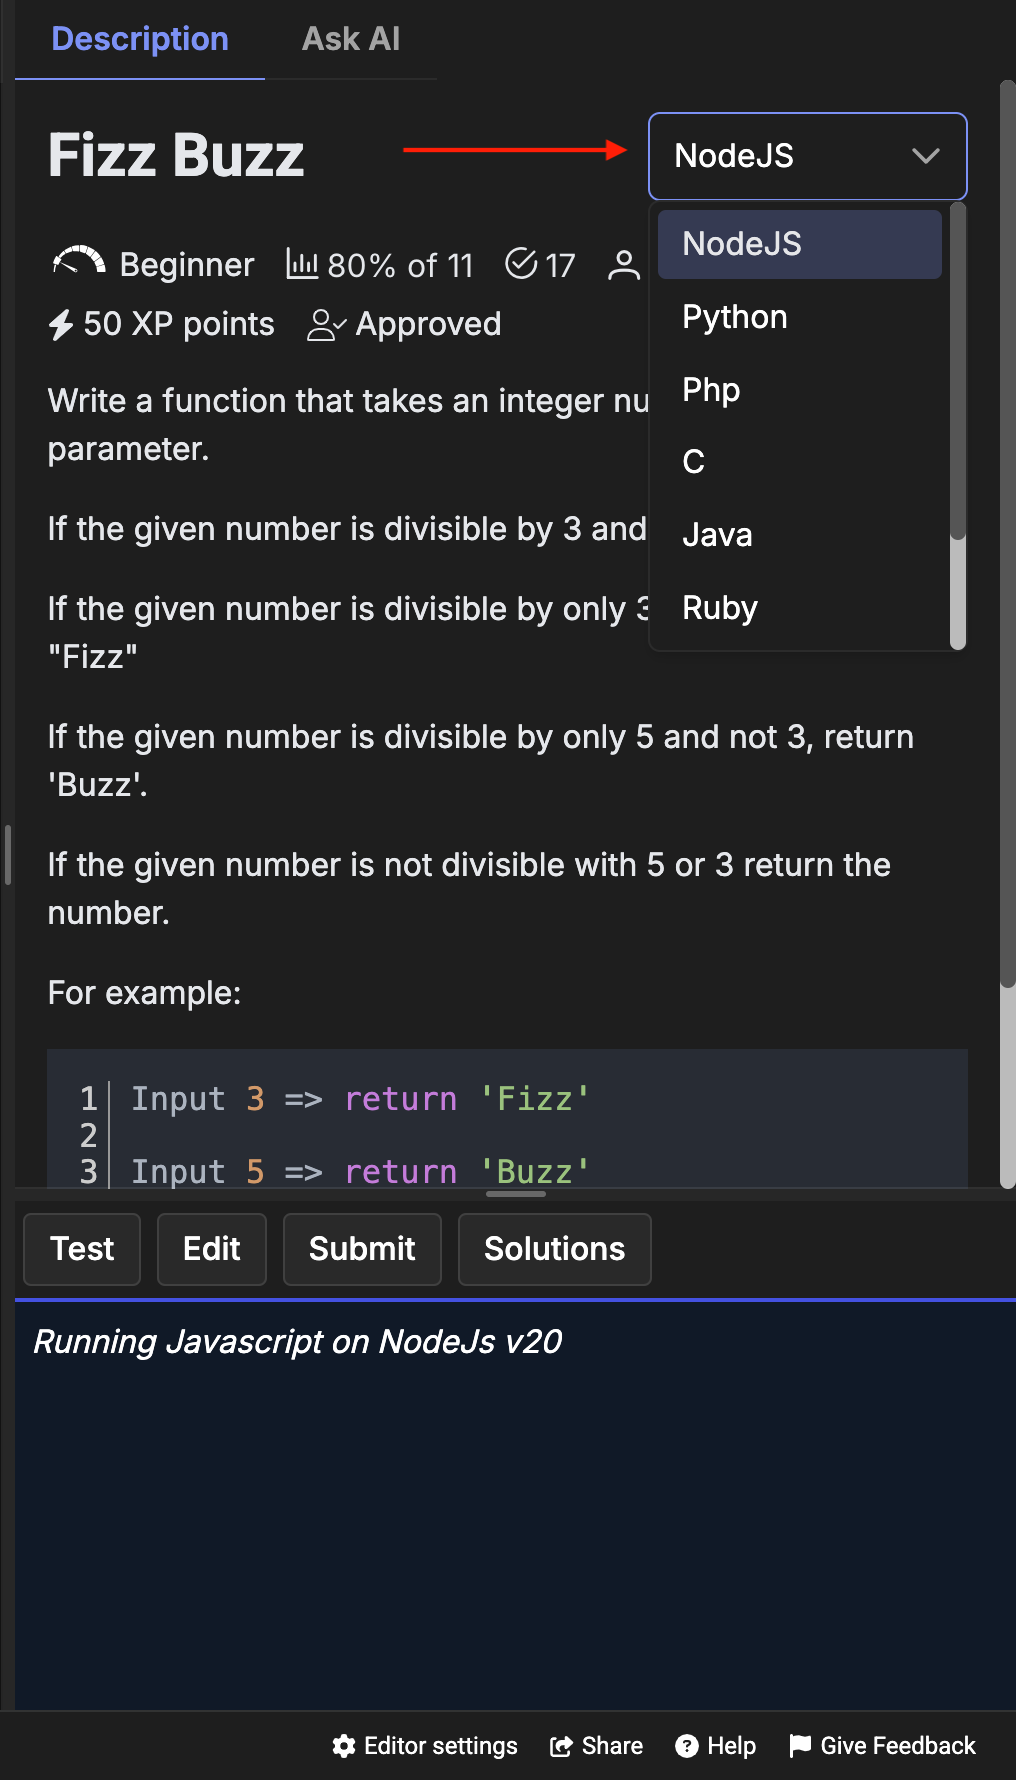
Fig. 2
On the top-right corner of the Challenge info area, you will find a dropdown menu that allows you to choose the template in which you want to solve the challenge. (Fig. 2)
This gives you the flexibility to work with the environment and language you are most comfortable with, or to experiment with different ones.
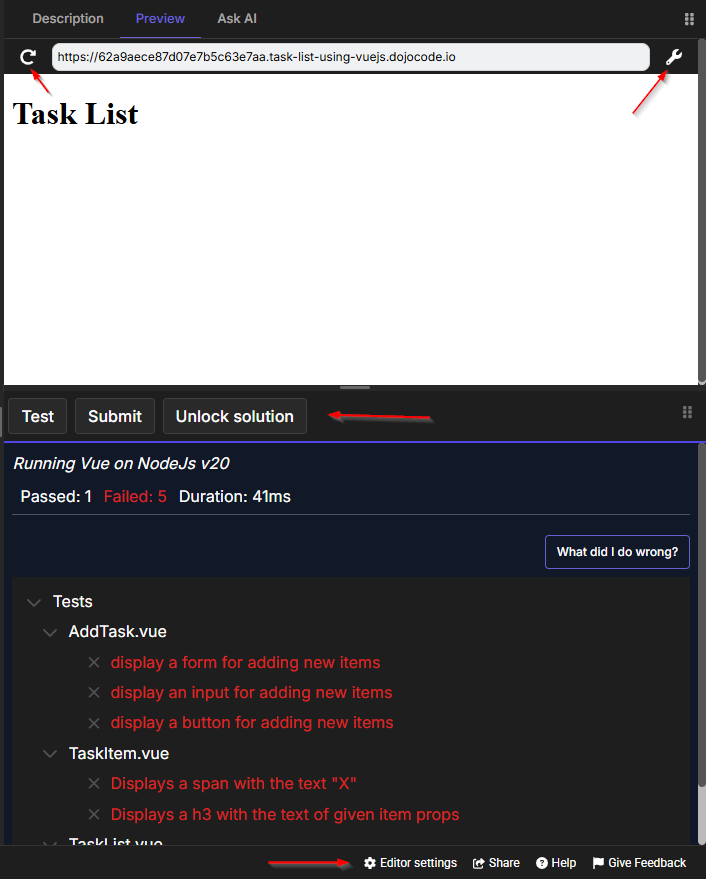
Fig. 3
In the Editor area (Fig. 1), you can write your solution. You can use the Run button to execute your code against the challenge environment, or the Test button to run initial tests against your solution. This allows you to verify your logic before submitting, with support for all major languages.
The Preview area (Fig. 1) displays the visual output (for browser-based challenges). You can also resize the panels using the enhanced splitter bar to customize your workspace. Console logs and output from your code execution will appear in the test results output area, located under the action buttons.
Preview Area also has the “Run”, “Test”, "Edit", “Submit” and "Solutions" buttons. Additionally you’ll find the Help Button. This help function gives you step-by-step guidance, explaining every detail on the page.
- Run Button: Executes your code directly in the editor.
- Test Button: Runs the initial tests against your solution.
- Logs Output: View real-time console logs and debug information from your code's execution within the test results output area.
- AI Test Explanations: If your tests fail, the Chat AI can now provide specific explanations for the failures to help you debug faster.
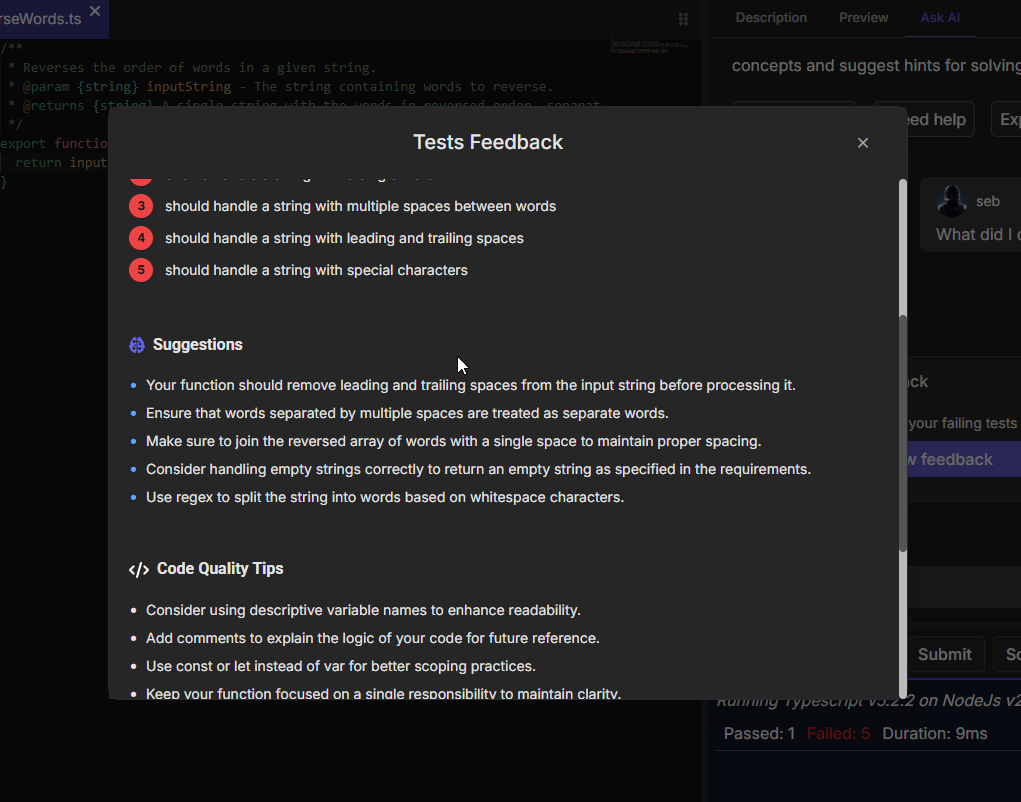
Fig. 4
The Chat tab gives you access to DojoCode's built-in AI assistant. It supports two modes — Understand for learning and hints, and Implement for AI-powered coding. To learn more, see the AI Assistance guide.
The Feedback Button is next to the Help Button, where you can leave feedback based on your experience on the platform. You can write your review, or you can choose between certain feedback already proposed such as: "I don't understand the task", "The tests are not working correctly" or "Autocomplete doesn't work". (Fig. 5) 
Fig. 5
The Share Button is a function through which you can share your solution on different communication channels, such as Email, Twitter, LinkedIn, HackerNews, Reddit, Facebook, Skype or Messenger.
In the Editor Settings, you'll find different features for your code, you can customize it to your liking. See Fig. 6 The features are as follows:
- Code Editor Theme: Here you can choose your code editor theme. You can choose from a multitude of themes, your favorite theme.
- Code Editor Font Family: Here you can choose which font you want to find in your code editor
- Code Editor Font Size: With this option, you choose the size you want the font to have
- Code Editor Key Binding: The Emacs and Vim keybinding options in the code editor allow users to adopt the respective text navigation and editing shortcuts from Emacs or Vim, providing a familiar and efficient editing experience for users accustomed to these editors.
- Code Editor Indent Width: Choose what indent width you want the code editor to be. The limit is 8.
- Code Editor Indentation: Choose how you want the indentation to be produced in the code. You have two options: spaces or tabs
- Emmet: This is a built-in plug-in for editing tests, this tool helps you write code faster.
- IntelliSense: IntelliSense is a code-completion aid that includes several features: List Members, Parameter Info, Quick Info, and Complete Word. IntelliSense is supported in HTML/CSS, JavaScript and TypeScript.

Fig. 6
INFO
On the Solutions page, you will have access to all the solutions submitted by the community.
What's Next?
After solving a challenge, you can:
- 🎯 Learn what happens after solving
- 👀 View and compare solutions
- 🔓 Unlock solutions for help
- 🏆 Check your points and levels
Ready to create your own challenges?