Create a Code Challenge
Help for Creators
Guidelines and guidelines again! You can read the guidelines available on the platform, each of the sections of the guidelines can help you better understand the rules and what you need to do to create a successful challenge.
Bring the popcorn! We have created a video tutorial where you can see step by step, what you have to do to create a challenge. Following this tutorial and reading all the documentation, you shouldn't have any more problems in creating a challenge.
INFO
You should know that creating a challenge is not an easy job, and there are some differences between solving a challenge and creating one. Please take into consideration that creating a challenge is a job that requires rigor and seriousness for DojoCode users to be satisfied and give you positive feedback.
Requirements
Only users that have reached the level Ambitious DOJO can create a new challenge.
How to create a challenge step by step
First you will have on the My Challenges page the section NEW DRAFT
After pressing the NEW DRAFT button, a popup will appear where you need to define the Name, the Slug, and the template of your choosing. (Fig. 1)
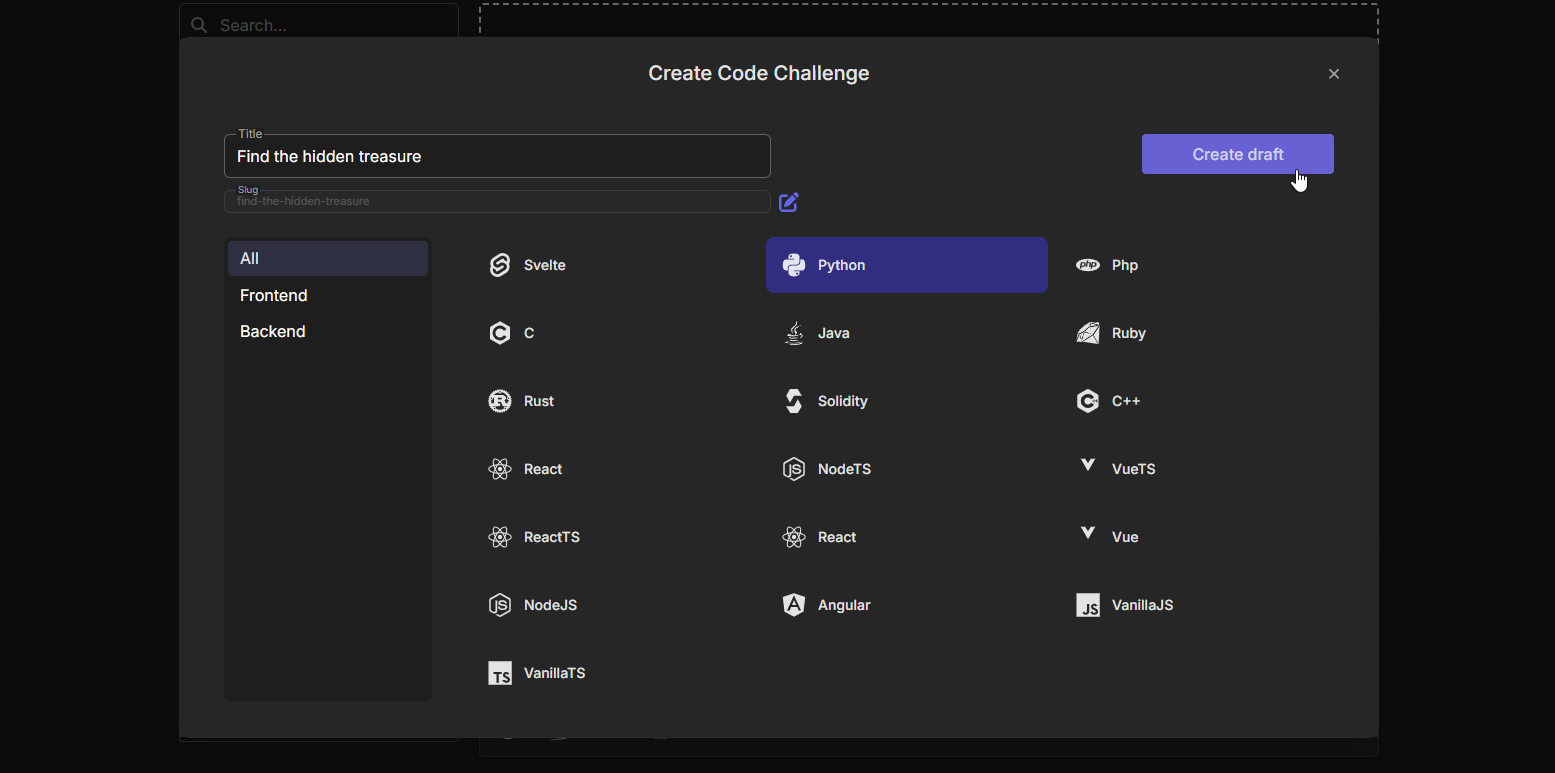
Fig. 1
Select the template you like for the coding challenge. In this example, we will select the Python template.
Once you finish these steps press Create draft and you will be redirected to the edit challenge page.
On the edit page, you will find 3 sections: Challenge info (Fig. 2), Files (Fig. 3), and Dependencies (Fig. 4).
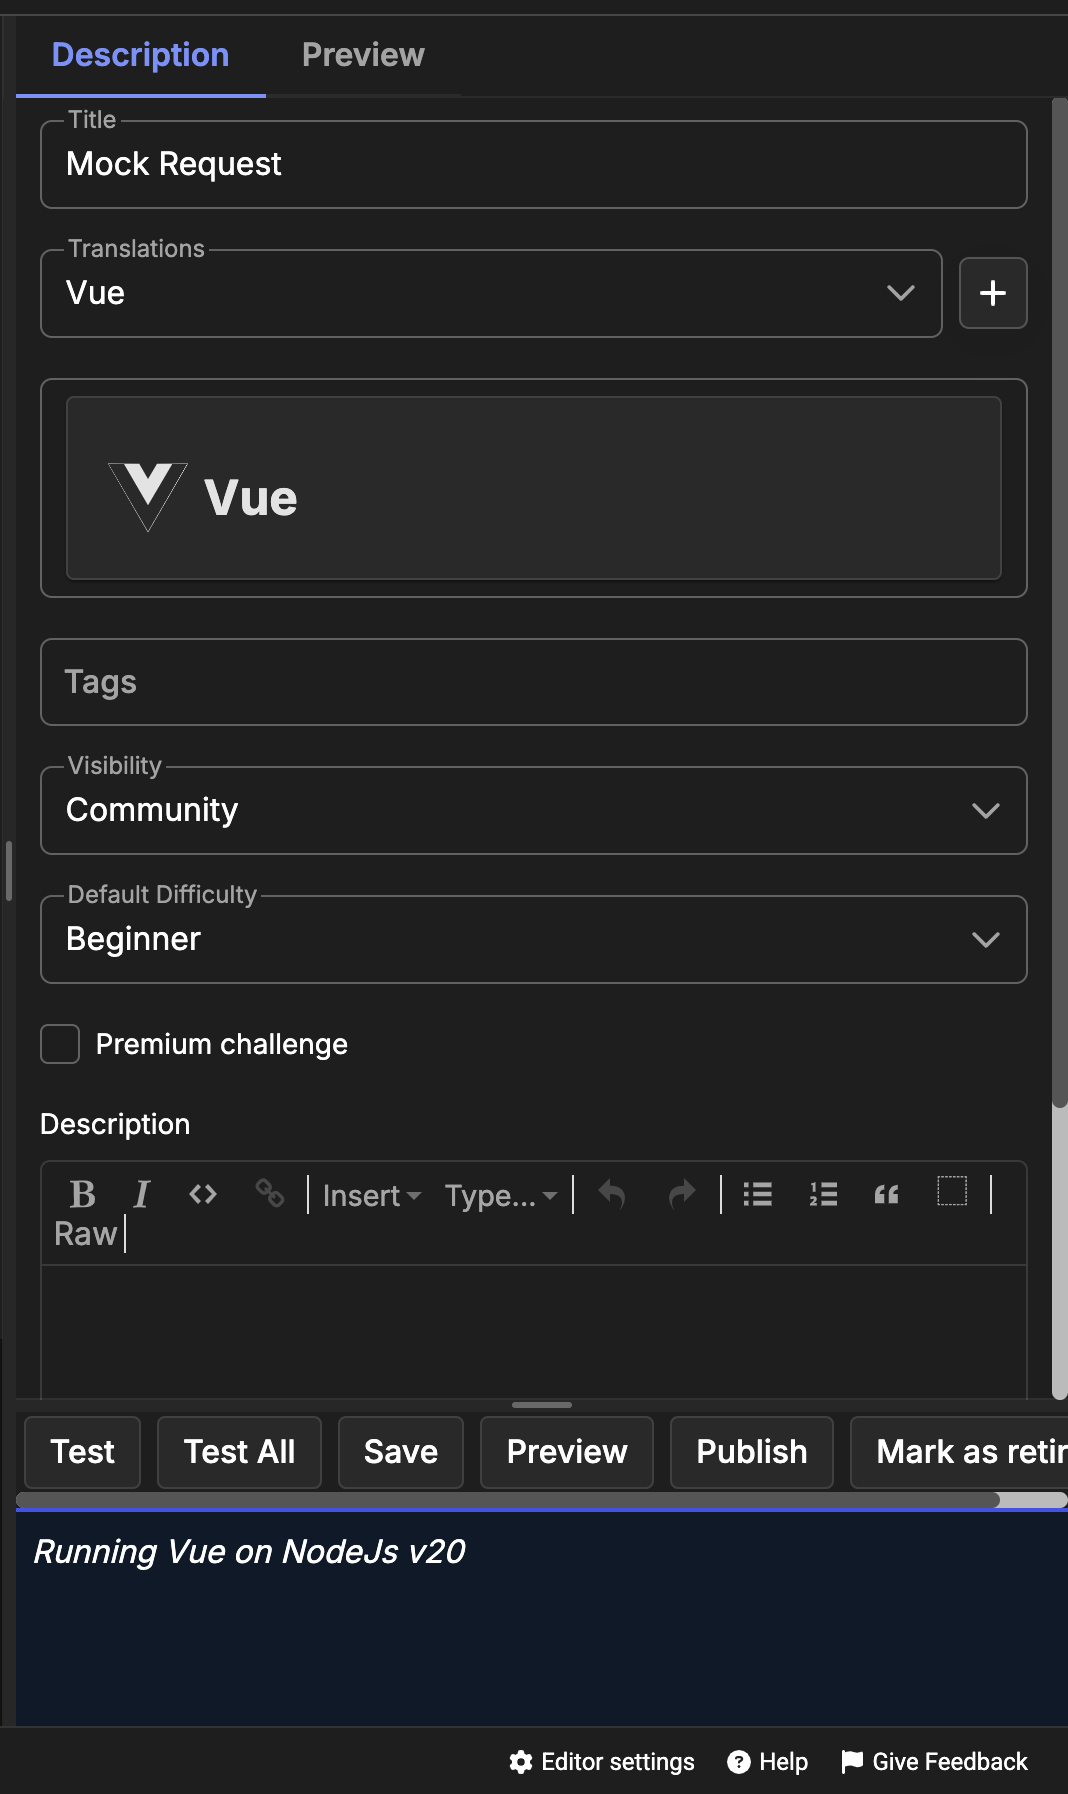
Fig. 2
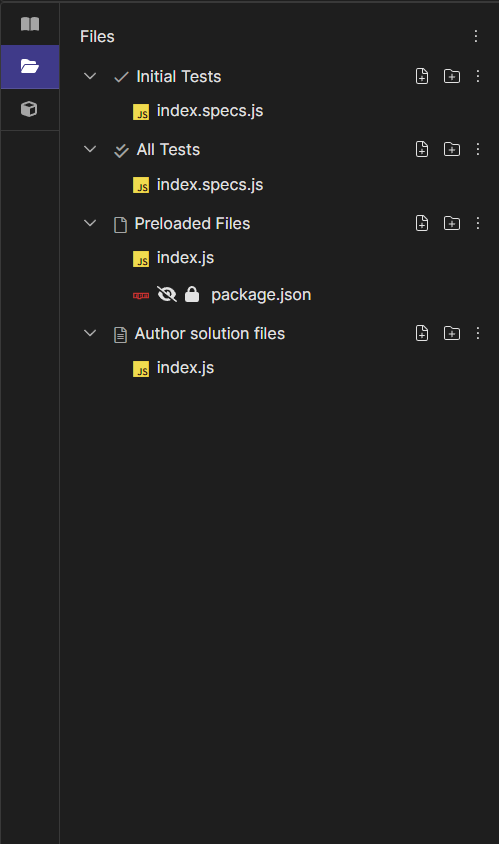
Fig. 3

Fig. 4
Follow these simple steps to create your DojoCode Challenge:
The first tab, Challenge Info (Fig. 6).
Here you can write your description for the challenge. You have 3 categories in this tab:
The Title is the first thing you have to complete on the Challenge Info Page. Try to make the chosen title interesting and short. We don't want a boring and long title, the idea is to catch the audience.
Another important part that you need to complete on the Challenge Info is the actual description. Writing the description is a very important process. Here you have different functions at your disposal that can help you create the clearest and highest quality content. Among the functions are the choice of type of writing, the choice of titles, and different writing styles such as bold, italic, or underline, but you also can add pictures or links.
You can insert videos in your Challenge Description to have a more explicit or detailed challenge description. You can embed the video from YouTube or Vimeo, by adding the link in the specific area. (Fig. 5)
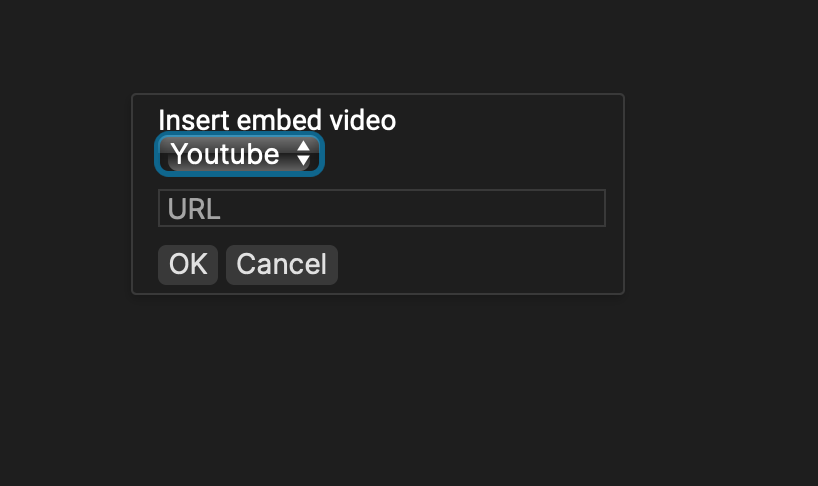
Fig. 5
When setting up your challenge, you are not limited to the default code template. As seen in Fig. 6, in the Translations section, you can translate your code challenge in multiple templates by pressing the “+” button to add another programming language.
Template Validation: All template translations are automatically validated before you can publish, ensuring quality.
You can create as many template variations as you want, to enable the learners to solve the challenge in different programming languages.
Each new template will automatically copy the basic details from the initial template variation, making it easier to keep everything consistent.
If you want to provide extra details or instructions for a specific template variation, you can simply include them in the Challenge Description.
You can also select or create tags for your code challenge. You can simply type something in Tags input and select a tag if exists or you can simply press enter and will create one based on what you typed.
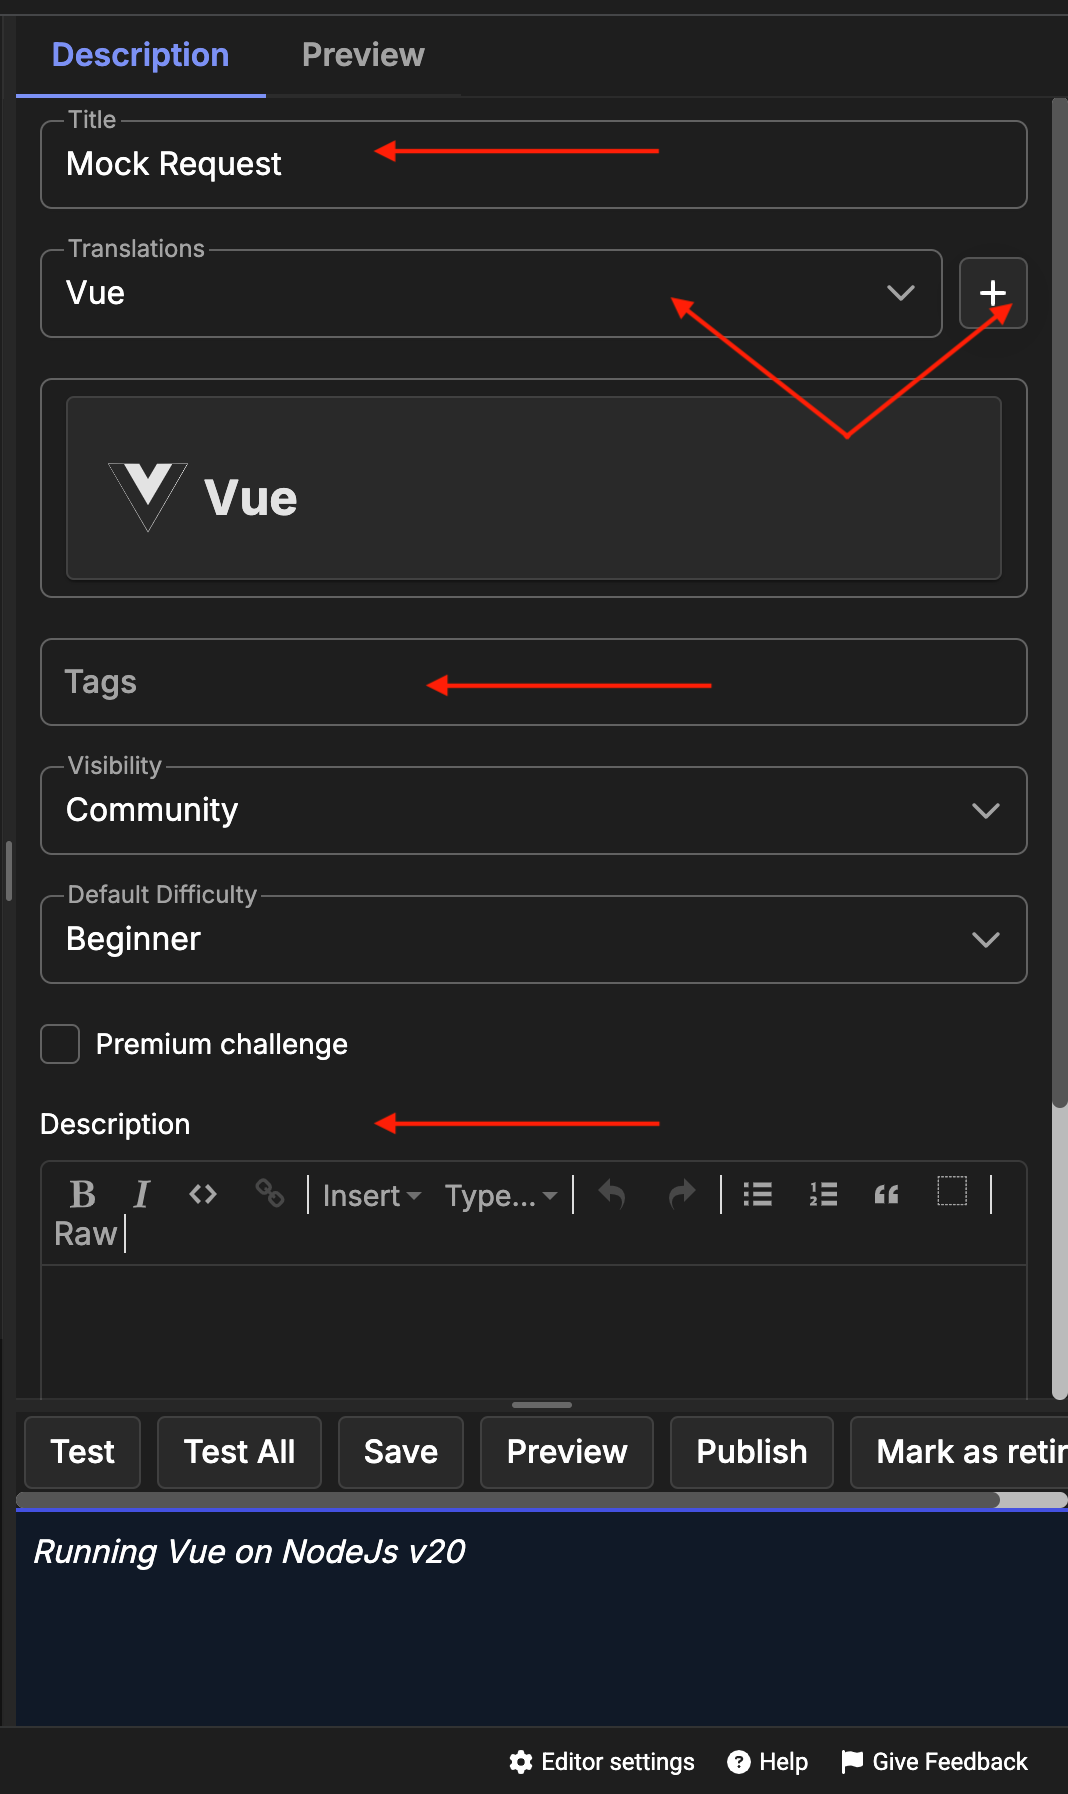
Fig. 6
For NodeJS code challenges you can also enable browser preview. A good example would be an Express application where we aim to create a server with routes to which we can send requests. Once you click on this option, the browser preview will open on the right side, allowing us to see the changes in our backend challenge (see Fig. 7).
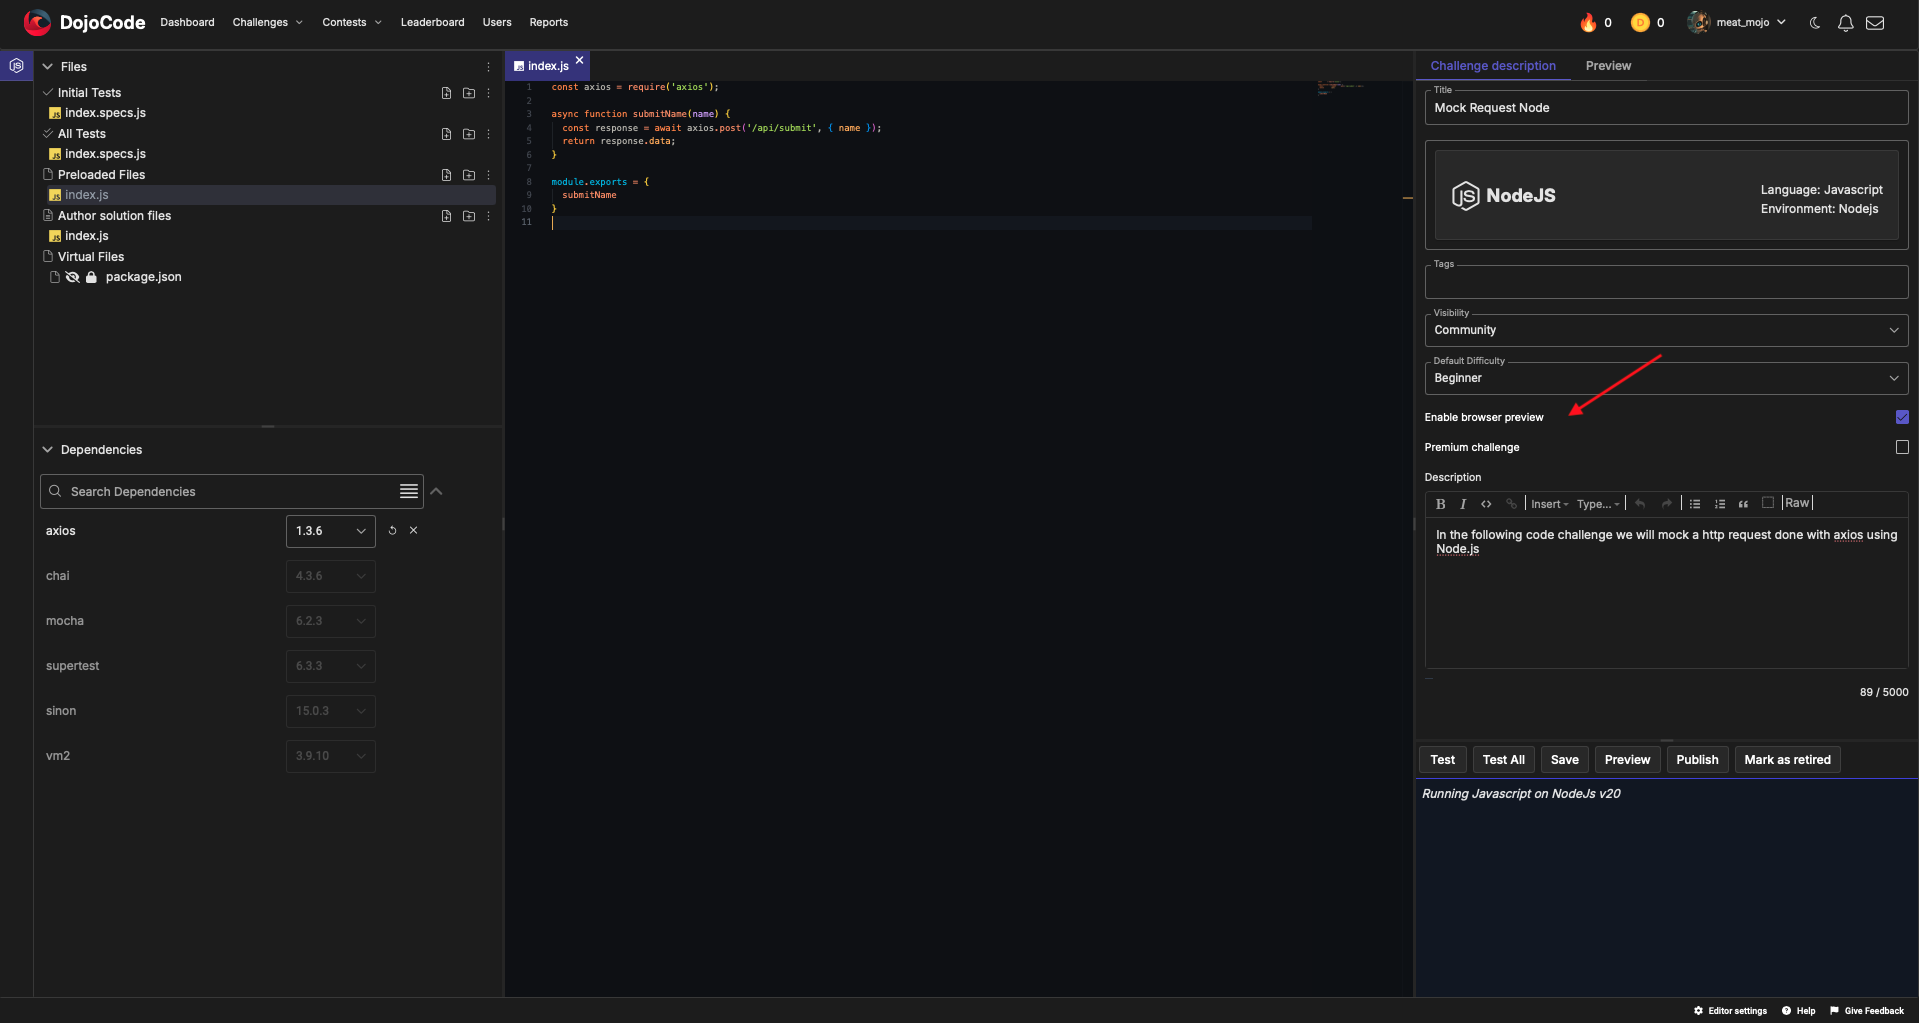
Fig. 7
In the Files tab, you are supposed to upload the test files or other preloaded files that are needed for the challenge. Based on the template you choose, we will generate a boilerplate for you, providing some starting files for modification. You can also import or export files for your code challenge by clicking on the right icon in the "Files" section and selecting an option (Fig. 8).
A quick and easy solution is as follows: if you wish to work in an IDE, you can export the initial files, unzip them on your computer, and open the folder using your favorite IDE. When you have finished working, simply import a new zip file containing your code challenge files.
AI-Powered Challenge Creation
You can also create and manage challenges directly from AI-powered IDEs like Claude Code, Cursor, or VS Code using the DojoCode MCP integration. Browse challenges, write code, run tests, and publish — all without leaving your editor. Learn more about IDE integration.
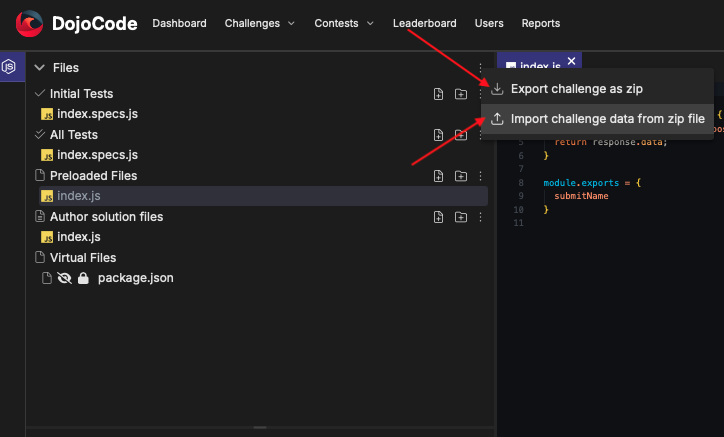
Fig. 8
In the Initial Tests and in All Tests you need to upload the tests that verify the users' solutions to the challenge.
In the Preloaded Files section, add the initial codebase provided to the user. These files serve as the starting point for the challenge, containing any necessary boilerplate or skeletal code the user needs to build upon to complete their solution (Fig. 8).
- Hidden File: This file will not be visible when the challenge loads on the View Page, but users can toggle hidden files' visibility.
- Read-Only File: This file cannot be edited by users attempting to solve your code challenge.
- Redacted File: This file will not be sent for validation when the solution is submitted.
- Initially Opened File: This file will be the first one opened when a user attempts to solve your code challenge. Only one file can have this property.
- Main File: This is the primary entry point for your challenge. It is the file that will be executed when the "Run" button is clicked. Only one file can be designated as the Main File.
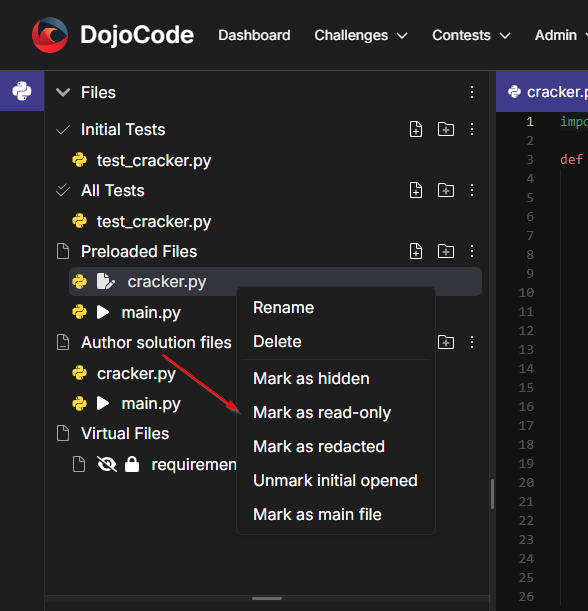
Fig. 9
The final category in the Files tab is Author Solution Files. Here, you upload the final solution for the challenge. This part will only be available to users after they unlock the Solution version of the challenge.
Main File Info
The Main File is crucial for the challenge execution. While the Initially Opened File determines the user's starting view in the editor, the Main File defines which file the platform's runner should execute. For example, in a Java challenge, this would be the file containing the public static void main method.
The last tab, Dependencies, is where you select the necessary dependencies for your challenge to be solvable. This is an important detail as there might be code libraries or frameworks that you wish to use in the project.
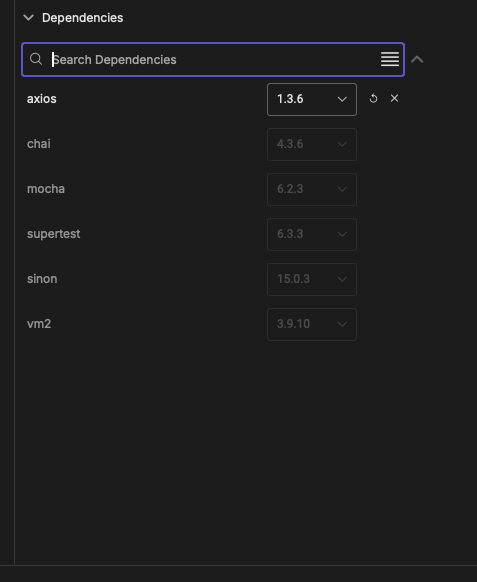
Fig. 10
Know what you want! In the beginning, it's good to know exactly what you want from your challenge. To create the exact description and request and to make yourself understood, it is good to outline exactly what you aim to achieve with the challenge.
Know your competition! Try your challenge not to be similar to others on the platform. The more original, the better.
It is recommended that for each uploaded challenge the creators read the guidelines and all its subchapters.
Related Resources
Before creating your challenge:
After publishing:
Once you are happy with your challenge and do not want to make any additional changes, you can publish it. Initially, your challenge will not have a difficulty rate, it will be acquired along the way. However, you can set a default difficulty (Fig. 11). This difficulty will be helpful for calculating the rating of a contest user for challenges that are not rated yet by the community. Read on to find out how your challenge will receive difficulty level.
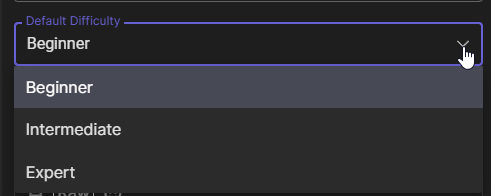
Fig. 11
Important
When creating a new code challenge, it’s essential to ensure that the solution meets the expected criteria and passes all relevant tests. This document outlines how to set up, debug, and run tests effectively.
- Implement the Solution: Write the initial solution for the challenge, ensuring it adheres to best coding practices.
Set Up Testing
- Initial Tests: These tests verify that the author’s solution meets the basic requirements.
- All Tests : Comprehensive tests that cover all edge cases and scenarios.
- Running Tests
- Buttons Overview
When you are in the challenge interface, you will find two primary buttons for testing:
- Test: Executes the initial tests on the author's solution.
- Test All: Executes all tests, including comprehensive tests.
Testing Workflow
Preview: Use the preview feature to see how the challenge appears to users. This also allows you to validate the formatting and presentation of the problem statement.
Run Code: Click the Run button to execute your code against the environment. This is useful for debugging your logic and viewing real-time console logs in the output area.
Run Initial Tests: Click the Test button to execute the initial tests. This ensures your solution is functioning as expected at a basic level.
Test All: Once you are satisfied with the initial tests, click the Test All button. This will run all tests, including comprehensive and hidden ones, providing a thorough evaluation of your challenge solution before publishing.
Debugging:
If any tests fail, review the error messages provided. They usually indicate which test failed and why. Use print statements or logging to output intermediate values in your code to trace where things might be going wrong. Rerun the tests after making adjustments to your code to ensure that issues have been resolved.
After publishing a Code Challenge
After publishing a Code Challenge you will no longer be able to edit your code challenge. Your code challenge will be submitted for review(BETA process), where users will vote on the challenge difficulty.
How does a challenge get its difficulty rating?
The first 3 users who complete and finish the challenge and who want to vote the difficulty of the challenge, will be able to give a difficulty score. This score starts from 1 and goes up to 3:
- 1 represents beginner
- 2 is intermediate
- The highest value in the scoring system is 3 which represents expert.
The difficulty will be represented by the average of the first 3 users who choose to vote for the challenge.
It is not mandatory for a user to vote for the difficulty of the challenge, but if you solve a challenge without difficulty, you will receive the points for solving that challenge only after it has the difficulty set.
For the first 3 users who choose to vote for the difficulty, they will receive, in addition to the difficulty score of the challenge, established later, a bonus of 40 points because they chose to vote for the difficulty. The bonus consists of 20 points because they solved a challenge without difficulty and 20 points because they chose to give it a difficulty rate.
If a user solves a challenge that does not have a difficulty rating but chooses not to vote for its difficulty, he will receive a bonus of 20 points.
After the difficulty has been set, the users who solved the challenge before will receive the score according to its difficulty.
After a challenge has received the first 3 votes, and the voting period has ended, it receives the difficulty rate and is put under the "approved" status.
Challenge curator will also be rewarded with XP points and DojoCode Tokens after the challenge received "approved" status and difficulty. See the next table for more information.
| Difficulty | XP Points | DojoCode Tokens |
|---|---|---|
| Beginner | 50 | 50 |
| Intermediate | 200 | 100 |
| Expert | 500 | 200 |