Setting Up LTI Authentication
As a business user you have the ability to set up Learning Tools Interoperability (LTI) authentication for your account. Follow the steps below to get started:
Step-by-Step Guide:
Go to Settings:
- Log in to your business account.
- Navigate to the Settings section by clicking your profile icon in the top-right corner.
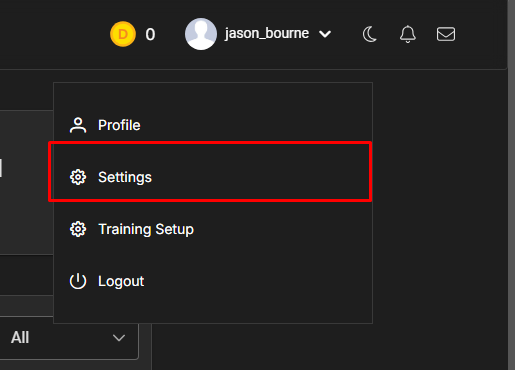
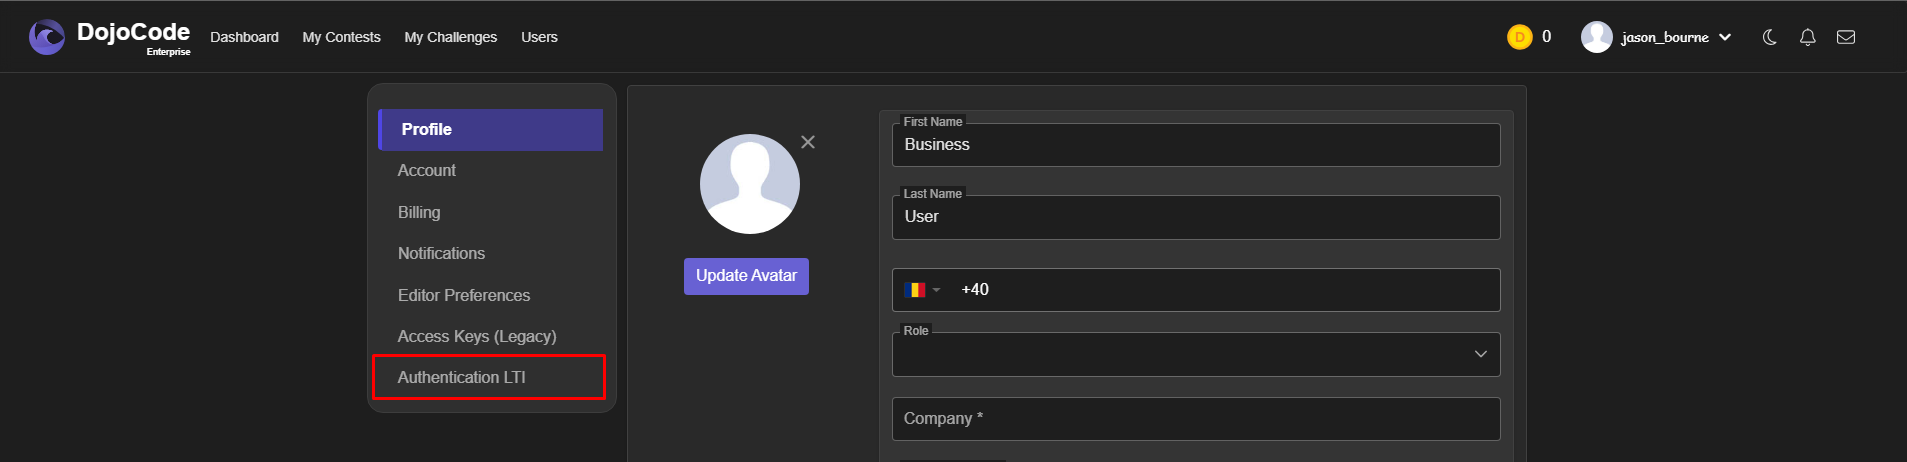
Select "Authentication LTI":
- In the Settings menu, look for the option labeled Authentication LTI and select it.
Configure LTI Custom Settings:
Once you are in the Authentication LTI settings, you will see the LTI Custom Configuration form.
Fill in the following required fields:
- Platform URL: Enter your Canvas instance URL
- Platform Name: Enter a descriptive name for your platform
- Client ID: Enter the Client ID provided by your LMS administrator
- Authentication Endpoint: Enter the OAuth authorization endpoint URL
- Access Token Endpoint: Enter the OAuth token endpoint URL
- Auth Method: Select
JWK_SETfrom the dropdown - Keyset URL: Enter the JSON Web Key Set (JWKS) URL for key validation
- Theme: Choose your preferred theme (Dark/Light)
Note: The values shown in the form above are examples only. You will need to obtain the actual configuration values from your LMS administrator or Canvas documentation.
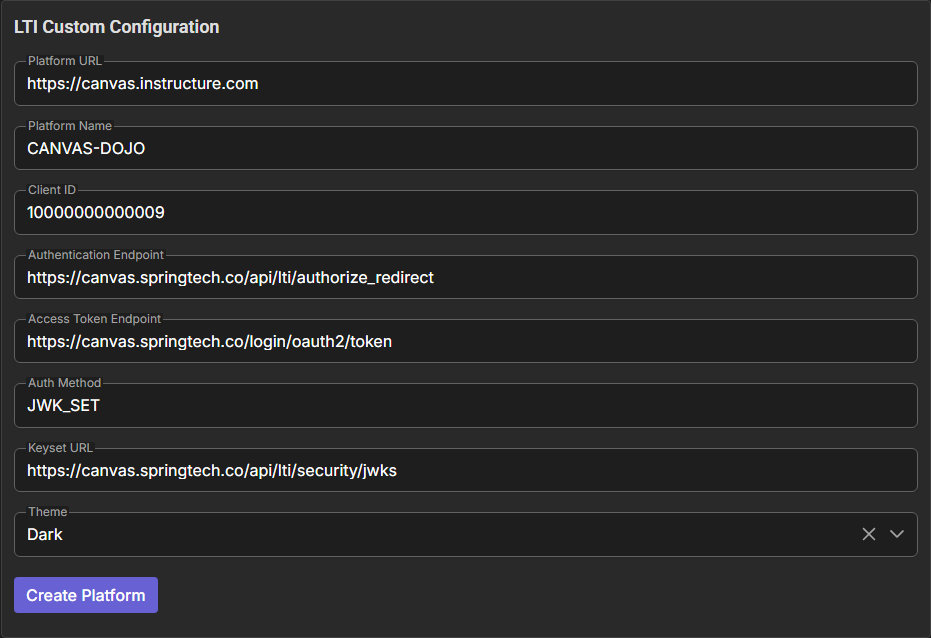
Create Platform:
- Review all the entered information to ensure accuracy.
- Click the Create Platform button to save your LTI custom configuration.
- Your LTI integration will be ready to use with the specified LMS platform.
Need Help?
If you encounter any issues or need further assistance, feel free to contact our support team.
For community support and discussions, feel free to join our Discord channel – we’d love to have you there!