Code Challenge Curation
Welcome to the Code Challenge Creation Guide for Business Users at DojoCode Platform. This guide will walk you through the process of creating engaging code challenges on our platform. Whether you're looking to assess and improve your team's coding skills or enhance your company's coding culture, you've come to the right place.
Getting Started
Before we dive into the steps, it's important to note that business users at DojoCode have the privilege of creating code challenges from the moment they subscribe to any plan. You don't need to accumulate points or reach specific levels to get started.
Check out the subscriptions plans and choose the one that fits you the most: Pricing Details
Requirements
INFO
As a business user, you have the flexibility to create code challenges right away. There are no additional prerequisites or requirements. Simply subscribe to one of our plans, and you're good to go!
Creating a Code Challenge - Step by Step
Access the Code Challenge Creation Page:
Once you've subscribed to a plan and logged into your account, navigate to the "My Challenges" page.
Start a New Draft: On the "My Challenges" page, you will find the "NEW DRAFT" section (Fig. 2).

Fig. 2
Provide Challenge Details:
Name: Give your challenge a distinctive name. Slug: You can choose to generate a slug automatically based on the title or create a custom one. Template: Select a code challenge template from the available options. 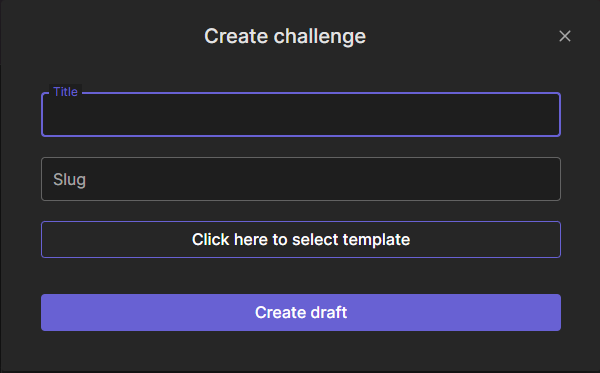
Fig. 3
Choose a Template:
Depending on your specific requirements, select a code challenge template that suits your needs. For example, you can choose the NodeJS template (Fig. 4). 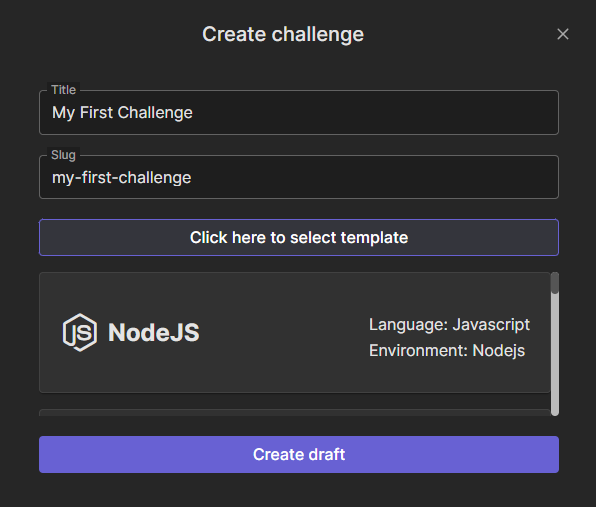
Fig. 4
Create Draft:
Once you've completed the above steps, click the "Create draft" button. You'll be redirected to the "Edit Challenge" page.
Editing Your Code Challenge
On the edit page, you'll find three key sections:
Challenge Info: This section allows you to provide essential details about your challenge (Fig. 5). 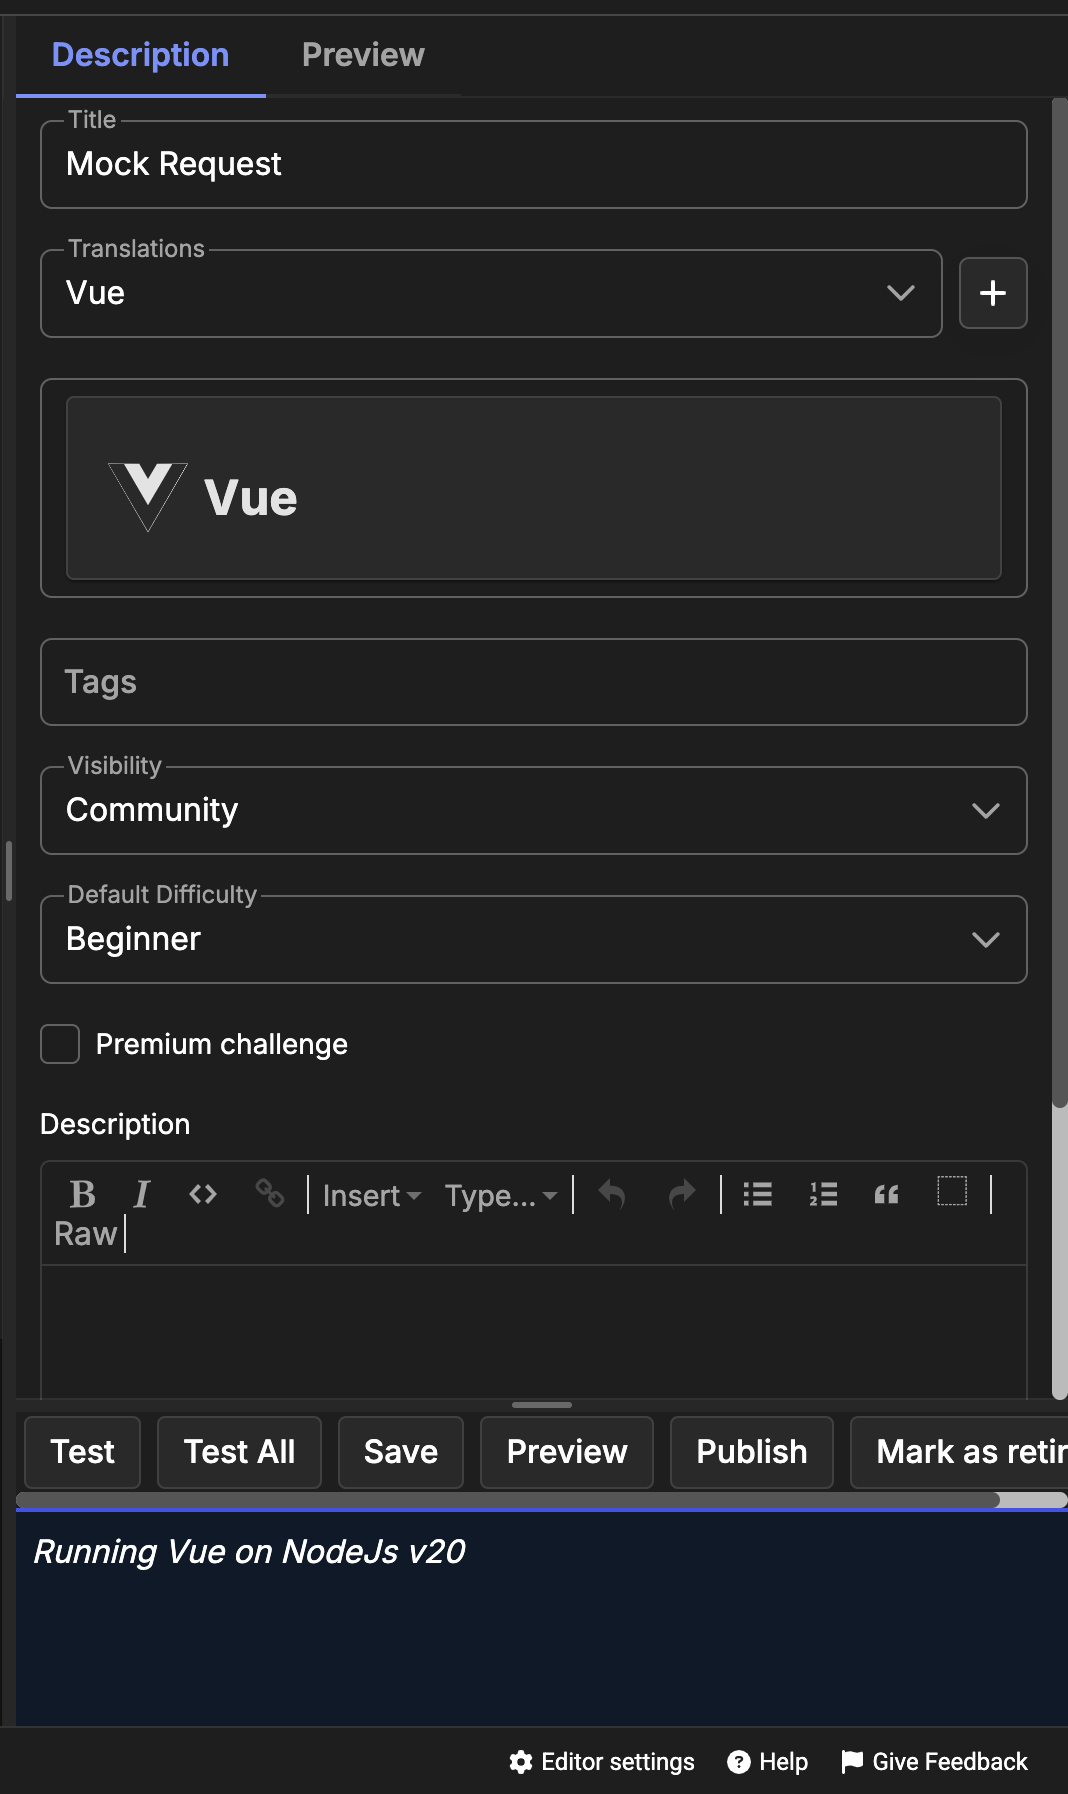
Fig. 5
Title:
Craft an engaging and concise title.(Fig. 6)
Description:
Write a clear and informative challenge description. Utilize formatting options like bold, italic, and underline, and even add images or links to enhance your content.(Fig. 6)
Tags:
Assign relevant tags to categorize your code challenge effectively. (Fig. 6) For NodeJS code challenges, you can enable browser preview to visualize changes in your challenge solution (Fig. 7).
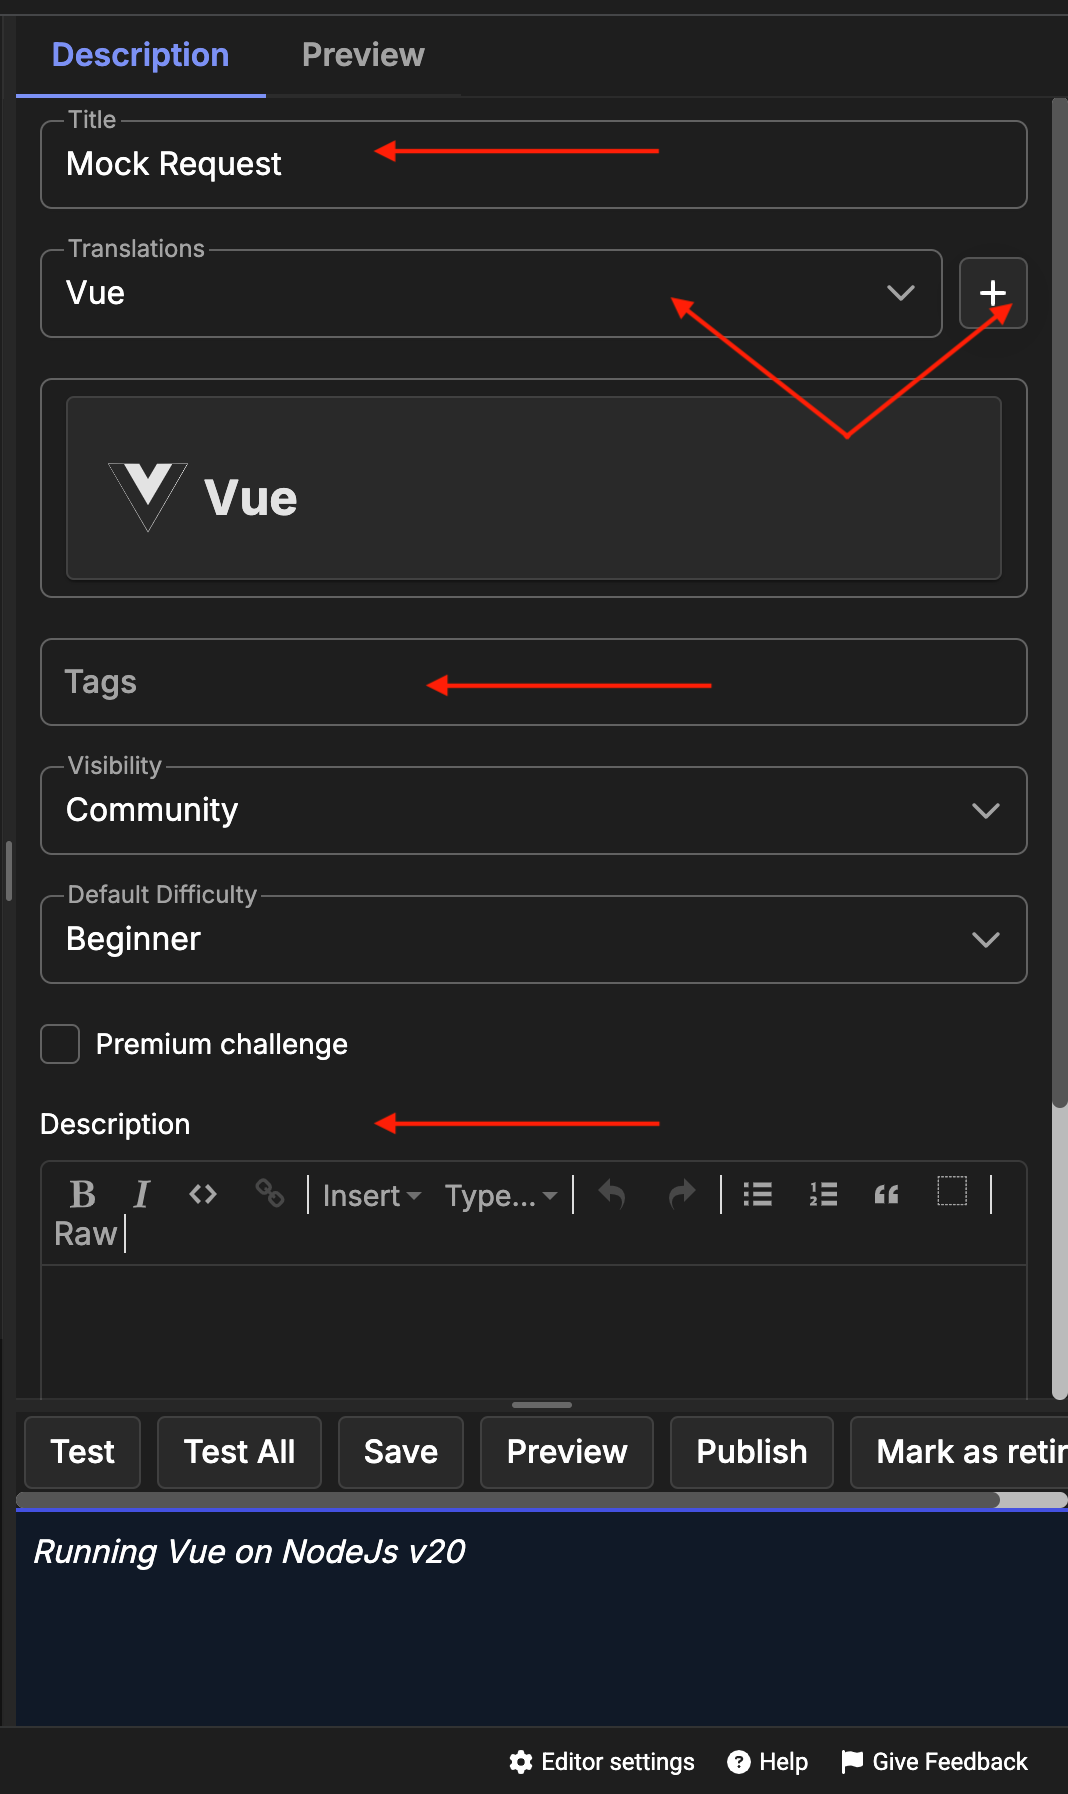
Fig. 6
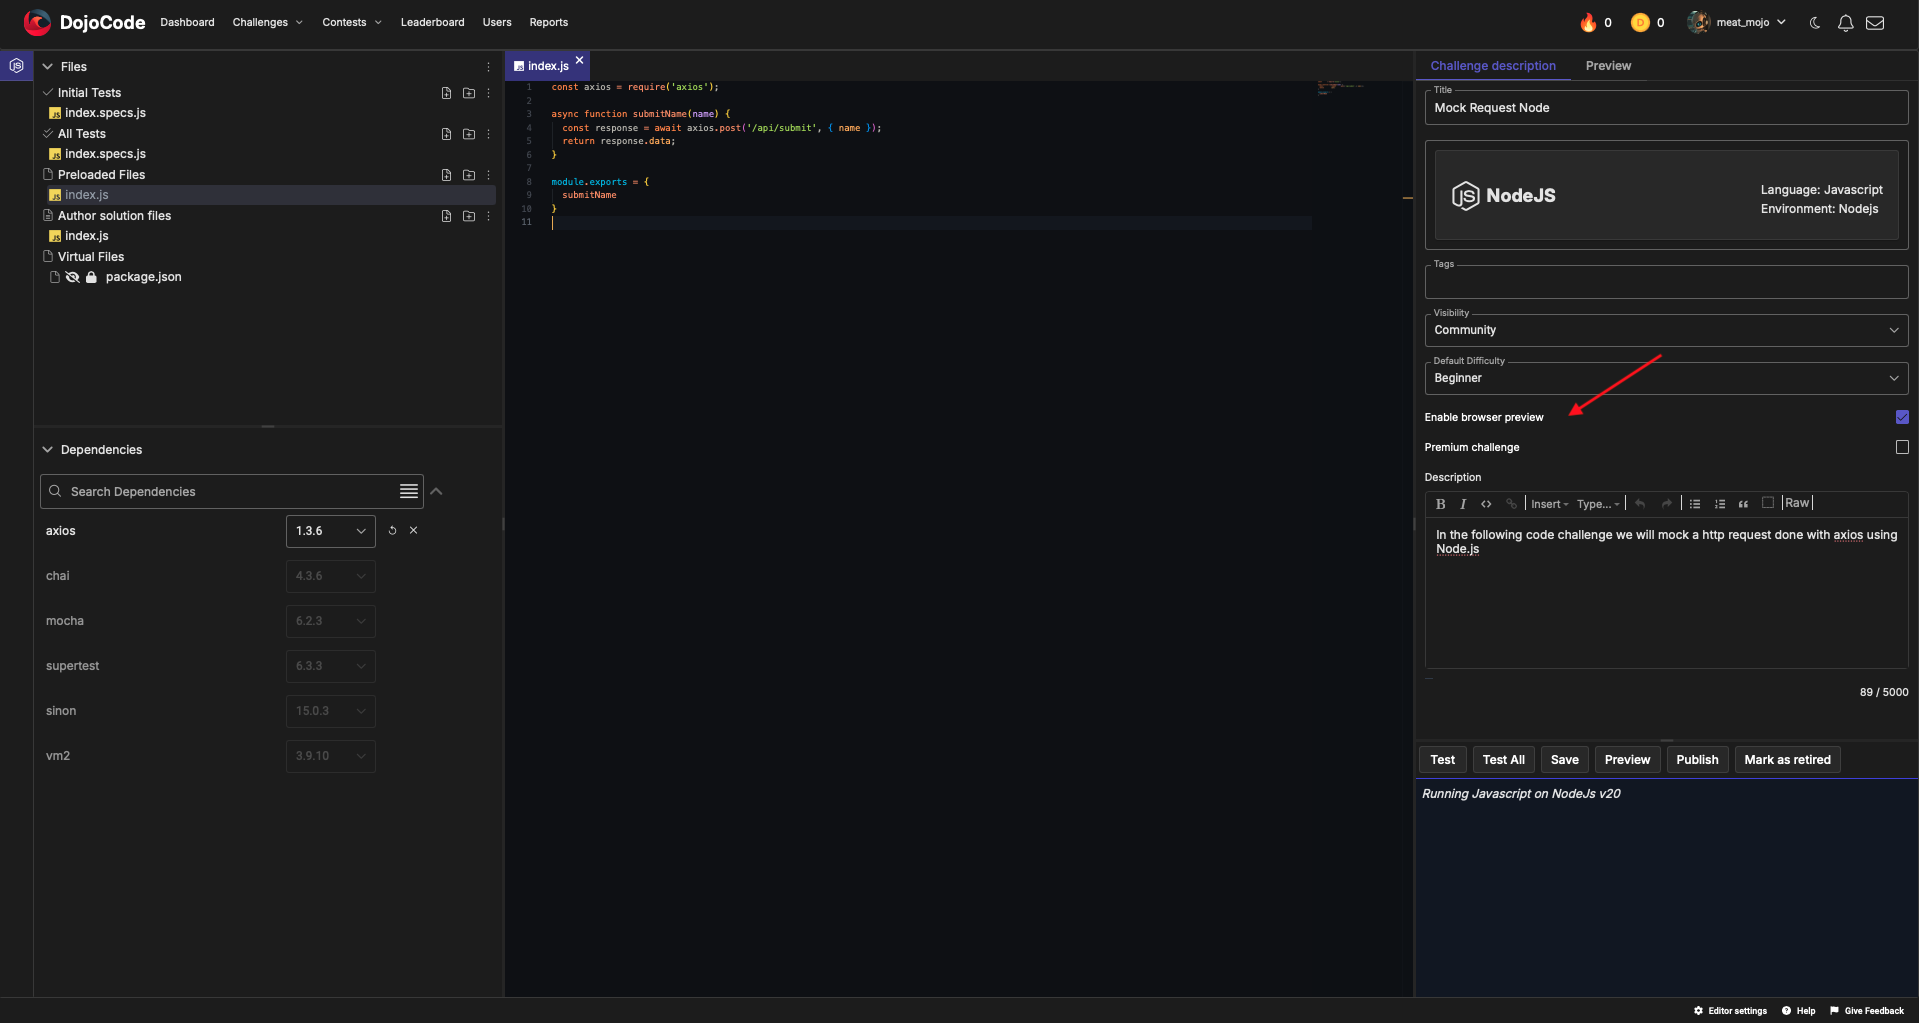
Fig. 7
Files:
Upload the necessary files required for your challenge. You can also import/export files for your code challenge (Fig. 8). 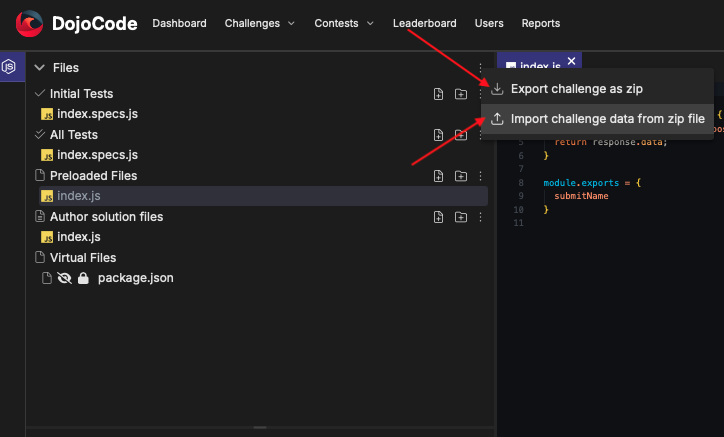
Fig. 8
Dependencies:
Select any required dependencies for your challenge. This ensures that participants have access to the necessary libraries or frameworks (Fig. 9). 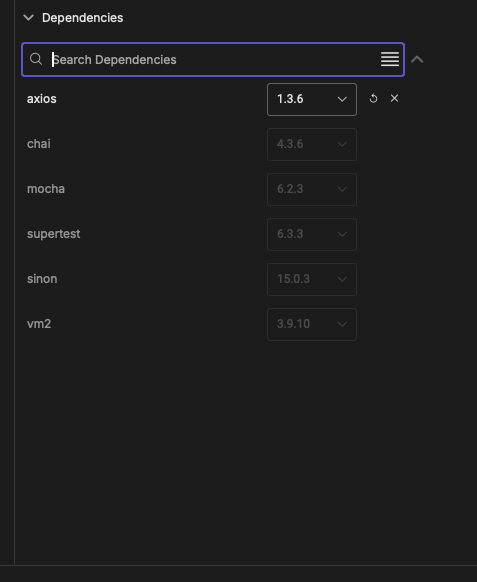
Fig. 9
Important
When creating a new code challenge, it’s essential to ensure that the solution meets the expected criteria and passes all relevant tests. This document outlines how to set up, debug, and run tests effectively.
- Implement the Solution: Write the initial solution for the challenge, ensuring it adheres to best coding practices.
Set Up Testing
- Initial Tests: These tests verify that the author’s solution meets the basic requirements.
- All Tests : Comprehensive tests that cover all edge cases and scenarios.
- Running Tests
- Buttons Overview
When you are in the challenge interface, you will find two primary buttons for testing:
- Test: Executes the initial tests on the author's solution.
- Test All: Executes all tests, including comprehensive tests.
Testing Workflow
Preview: Use the preview feature to see how the challenge appears to users. This also allows you to validate the formatting and presentation of the problem statement.
Run Initial Tests: Click the Test button to execute the initial tests. This ensures your solution is functioning as expected at a basic level.
Submit for All Tests: Once you are satisfied with the initial tests, click the "Test All" button. This will run all tests, providing a more thorough evaluation of your solution.
Debugging:
If any tests fail, review the error messages provided. They usually indicate which test failed and why. Use print statements or logging to output intermediate values in your code to trace where things might be going wrong. Rerun the tests after making adjustments to your code to ensure that issues have been resolved.
Tips for Successful Code Challenge Creation
Define Your Objectives: Clearly outline your objectives and what you want to achieve with your code challenge.
Be Original: Aim for uniqueness to stand out from other challenges on the platform.
Familiarize Yourself with Guidelines: Read and understand the platform guidelines thoroughly.
Engage with the Community: Participate in the community to gain insights and feedback. You can join the discussion on Discord and access additional information by visiting the #challenge-creator channel.
Publishing Your Code Challenge
After completing and editing your code challenge, you can publish it. Once published, your challenge will be submitted for review (BETA process). Users will then vote on its difficulty.
How Challenges Receive Difficulty Ratings
The difficulty of your challenge will be determined by you. When you have a business account all the challenges are in private mode, so only your team will be able to see them.
Conclusion
Creating code challenges for your business's coding and development needs is a valuable endeavor. It allows you to assess and improve the skills of your team members and enhance your coding culture. Remember that as a business user at DojoCode, you have the privilege to create code challenges as soon as you subscribe to any plan. Let's embark on this coding journey together!
For more information, you can check the developer side of documentation, Curation, about how to create, write and manage a new challenge.
